
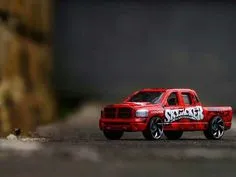
Understanding Diecast Photography
Diecast photography is more than just taking pictures of miniature cars; it’s an art form that requires precision, creativity, and a keen eye for detail. It’s about capturing the essence of these meticulously crafted models, bringing them to life through skillful use of light, composition, and post-processing. The goal is to create images that are visually appealing and that celebrate the beauty and craftsmanship of the diecast models. This often involves creating realistic scenes, simulating environments, and using techniques to enhance the model’s features. It can be a rewarding hobby that combines technical skills with artistic expression, allowing enthusiasts to share their passion for model cars with others. It is important to understand the basics before moving into the details.
Choosing the Right Equipment
The right equipment is the foundation of great diecast photography. While professional gear can enhance your results, you don’t need to break the bank to get started. The essentials include a good camera, suitable lenses, and effective lighting. Investing wisely in quality gear will significantly improve your photos, and allow you to grow as a photographer. Prioritize the items that directly impact image quality, and upgrade your gear as your skills and needs evolve. Consider what types of shots you want to achieve, and choose gear that helps you realize your vision. Always make sure your choice aligns with your budget and your skill level. It’s a good investment for long term satisfaction.
Camera Selection
For diecast photography, the camera is the most important piece of equipment. Both DSLR and mirrorless cameras are excellent choices, providing manual controls that allow you to adjust settings like aperture, ISO, and shutter speed. These settings are critical for controlling depth of field, exposure, and overall image quality. Ensure your camera offers a high-resolution sensor to capture fine details. If you’re on a budget, a smartphone camera can work for basic shots, but it won’t offer the same level of control and image quality as a dedicated camera. Look for cameras that can shoot in RAW format. RAW files contain more image data, which allows for greater flexibility during post-processing. A camera with good low-light performance is also beneficial, particularly when shooting indoors or in less-than-ideal lighting conditions.
Lens Choices
Lens selection is crucial in diecast photography, affecting the perspective and depth of field in your images. Macro lenses are highly recommended, as they allow you to get close-up shots and capture intricate details of the models. A macro lens with a focal length of around 100mm is a good starting point. It provides a comfortable working distance and excellent image quality. For more general shots and establishing shots, a standard zoom lens (e.g., 24-70mm) can be useful. Prime lenses, known for their sharpness and low-light capabilities, are another great option. Consider a lens with a wide aperture (e.g., f/2.8 or wider) to create a shallow depth of field, blurring the background and emphasizing the model. Think about the types of shots you want to take, and select lenses that match your creative vision. Start with a versatile lens or two, and expand your collection as needed.
Lighting Essentials
Lighting is one of the most important elements in diecast photography. Proper lighting can make or break a shot, so understanding the basics is essential. The goal is to illuminate the model evenly and create highlights and shadows that define its shape and details. You can use both natural and artificial light. For natural light, shoot during the golden hours (shortly after sunrise or before sunset) for soft, warm light. If you use artificial light, consider softboxes, umbrellas, and reflectors to control the direction and intensity of the light. Experiment with different light setups, such as side lighting to emphasize texture, or backlighting to create a silhouette. The goal is to highlight the model’s features and create a realistic scene.
Natural Light vs. Artificial Light

Natural light offers a beautiful, soft quality that is ideal for many types of photography, but it can be unpredictable. Artificial light provides greater control, allowing you to set up your shots indoors or outdoors. When using natural light, position the model near a window or in an open area. Avoid direct sunlight, which can create harsh shadows. Overcast days are perfect for diecast photography, as the diffused light is gentle and even. Artificial light setups usually involve using studio lights, speedlights, or continuous lights. You can control the intensity and direction of the light using modifiers like softboxes and umbrellas. Artificial lighting allows for more experimentation and creative control, allowing you to shape the light and shadow as desired. Choose the light source that fits your needs and resources.
Diffusers and Reflectors
Diffusers and reflectors are crucial tools for softening harsh light and controlling shadows in diecast photography. Diffusers, such as softboxes, umbrellas, or even translucent materials, soften and spread light, reducing harsh shadows and creating a more pleasing look. Place the diffuser between the light source and the model. Reflectors, on the other hand, are used to bounce light back onto the model, filling in shadows and creating highlights. You can use white foam boards, silver reflectors, or even a piece of white paper. Experiment with different angles and positions to see how they affect your shots. Place reflectors opposite your light source to fill in shadows, or angle them to create interesting highlights. With these tools, you can control the overall light and create the perfect shot.
Setting Up Your Scene
Setting up your scene is key to creating compelling diecast photography. The goal is to create a realistic and visually appealing environment for your model cars. Consider the background, the surroundings, and any props that will enhance your shots. Start with a clean workspace and a plan for the type of scene you want to create. Think about the story you want to tell with your photos, and choose elements that support the narrative. Pay close attention to detail; ensure the scene is believable and engaging. Experiment with different angles and setups until you find a composition that works. Remember, the best setups complement the model and bring your vision to life.
Backdrops and Environments

The backdrop is essential for setting the scene in diecast photography. There are many options, from simple paper backdrops to detailed environments. A plain backdrop, such as a seamless paper roll, is a great starting point. It keeps the focus on the model and provides a clean look. For more complex shots, use printed backdrops that depict streets, garages, or other settings. You can also create your own environments using materials like cardboard, wood, or foam. Get creative and build miniature dioramas to place your models. The choice of backdrop should complement your model and the story you’re trying to tell. Ensure that the backdrop is in scale with the models and that it doesn’t distract from the main subject. Consider how the background’s color and texture will affect the final image.
Composition Techniques
Mastering composition techniques can dramatically improve the quality and impact of your diecast photography. Composition refers to how you arrange the elements within your frame. There are several well-established principles, such as the rule of thirds and leading lines, that can help you create more balanced and visually interesting images. These techniques guide the viewer’s eye, creating a more dynamic and engaging composition. Consider the overall design of your shot, the negative space, and the positioning of your model within the frame. Practice these techniques regularly, and experiment with different angles and viewpoints. The goal is to create images that are visually appealing and that draw the viewer’s attention to the main subject. Using composition to its full potential makes it easier to tell a story.
Rule of Thirds
The rule of thirds is a fundamental composition technique that involves dividing your frame into nine equal parts using two horizontal and two vertical lines. Place the key elements of your scene along these lines or at their intersections. This helps create a balanced and visually appealing composition. Avoid placing the model directly in the center of the frame. Instead, position it along one of the lines or at an intersection. This creates a more dynamic and engaging image. Use the rule of thirds to guide the viewer’s eye and create a sense of balance. Experiment with placing your subject off-center to see how it affects your composition. With practice, you’ll instinctively start using this rule, improving your overall photography skills.
Leading Lines

Leading lines are another effective composition technique, where you use lines within the scene to guide the viewer’s eye towards the main subject. These lines can be roads, fences, or any other element that creates a visual path. The lines lead the viewer’s gaze into the image, adding depth and interest. Use the lines to create a sense of perspective and draw attention to the model. Experiment with different types of lines and how they interact with your model. The lines should lead towards your subject, not away from it, so it’s important to position the model strategically within the scene. Look for natural lines in your chosen environment and use them to enhance your composition. By carefully arranging the elements within the frame, you can create a stronger and more visually compelling image.
Post-Processing Techniques
Post-processing is essential for refining and enhancing your diecast photographs. Using editing software, you can adjust the colors, contrast, and details to achieve the desired look. This step is just as important as capturing the original shot. Start by adjusting the overall exposure and contrast to improve the image. Then, fine-tune the colors, ensuring they are accurate and visually appealing. Enhance the details by sharpening the image and reducing noise. Post-processing allows you to bring out the best features of your photos and add a unique artistic flair. Remember, the goal is to enhance the image, not to make it look artificial. Learning the techniques is essential to finishing the perfect shot.
Editing Software
Choosing the right editing software is key to successful post-processing. Adobe Lightroom and Photoshop are industry standards, offering a comprehensive set of tools for editing and enhancing photos. Lightroom is excellent for organizing and processing large batches of photos, while Photoshop provides more advanced editing capabilities and allows for complex manipulations. There are also many free or affordable alternatives, such as GIMP, Darktable, and Photopea. It’s a good idea to find software that fits your needs and budget. Start with the basic tools, such as exposure, contrast, and color correction. Learn how to use layers and masks to make targeted adjustments. Spend time practicing with the software, and familiarize yourself with the various features. Experiment to find the best tools that fit your workflow.
Color Correction and Enhancement

Color correction and enhancement are crucial steps in post-processing, helping to create a more visually appealing image. Start by correcting the white balance to ensure accurate colors. Adjust the overall color balance, paying attention to the highlights, mid-tones, and shadows. Use the HSL (Hue, Saturation, Luminance) sliders to fine-tune individual colors, such as the car’s paint or the background. Increase the saturation of the colors if needed to make the image more vibrant. Enhance the details by sharpening the image, but avoid over-sharpening, which can create artifacts. Reduce noise to ensure your image has a clean, professional look. Experiment with different color grading techniques to create a specific mood or aesthetic. Mastering these techniques will greatly improve the final quality of your photos.
Final Thoughts
Diecast photography is a rewarding hobby that combines technical skills with artistic expression. It involves a variety of elements, including camera techniques, lighting and post-processing. By understanding the fundamentals of composition, lighting, and post-processing, and by investing in the right equipment, you can create stunning images of your model cars. Keep practicing, experimenting, and refining your skills. Don’t be afraid to try new techniques and to develop your own unique style. Diecast photography is about celebrating the beauty and craftsmanship of model cars and sharing your passion with others. Enjoy the process and the journey, and always strive to improve your craft. Your effort will bring amazing results.