What are Custom Diecast Cars with Working Lights?
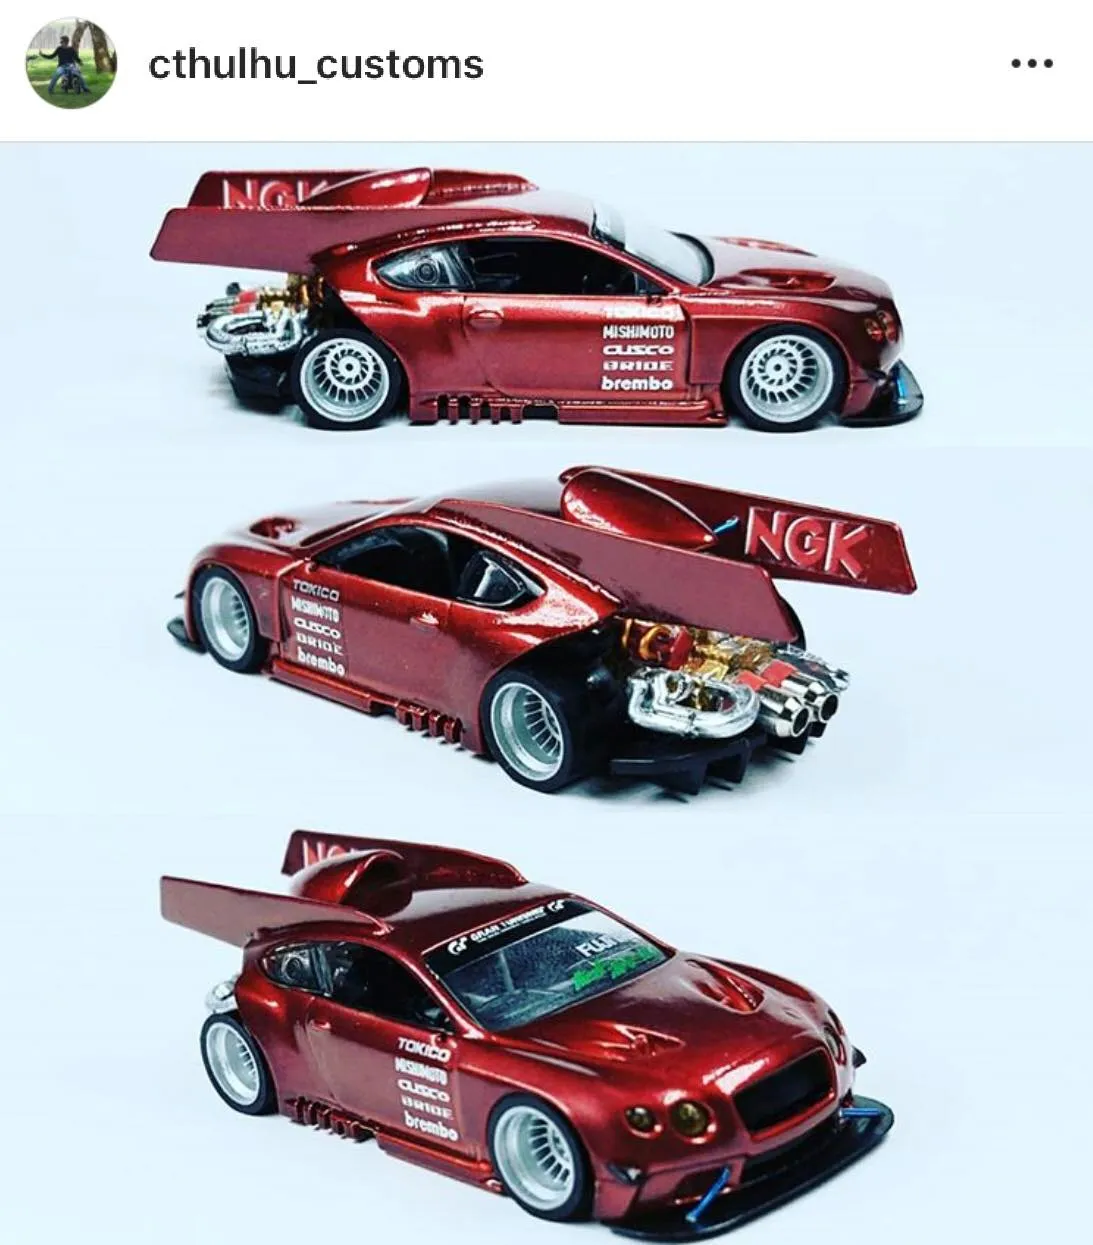
Custom diecast cars with working lights represent a fascinating blend of hobby, artistry, and technical skill. They involve modifying miniature, pre-made diecast model cars to incorporate functional lighting systems. This goes beyond simple detailing; it brings a new level of realism and personalization to these collectibles. Enthusiasts take pride in transforming off-the-shelf models into unique creations, adding a dynamic element that captures the eye and sparks imagination. The process often involves intricate work, demanding precision and a good understanding of electronics, but the results are undeniably rewarding, creating miniature masterpieces that stand out in any collection.
The Appeal of Customizing Diecast Cars
The appeal of customizing diecast cars is multifaceted. For many, it’s the thrill of creation—the ability to take a mass-produced item and infuse it with individuality. It’s a way to express creativity, whether through detailed paint jobs, custom decals, or intricate lighting systems. The hobby offers a satisfying sense of accomplishment, as each modification, no matter how small, contributes to a unique finished product. Additionally, it allows enthusiasts to connect with a broader community of like-minded individuals who share a passion for cars and craftsmanship, exchanging ideas, techniques, and inspiration. This community aspect fuels the hobby, providing support and encouraging innovation.
Working Lights in Custom Diecast Cars

Integrating working lights into custom diecast cars significantly enhances their realism and visual appeal. Functional headlights, taillights, and interior lights bring a dynamic element to the static model, making it more engaging and lifelike. The inclusion of lights transforms a simple collectible into a miniature replica that seems to come alive, particularly in a dimly lit environment. It also allows for creative experimentation, such as simulating different lighting effects and customizing the appearance of the vehicle. This adds another layer of personalization, showcasing the builder’s attention to detail and technical skill. The effect is a striking visual enhancement that elevates the overall aesthetic of the model.
Why Add Working Lights?
Adding working lights to custom diecast cars serves multiple purposes. Firstly, it significantly boosts the model’s realism, mirroring the functionality of a full-sized vehicle. This feature immediately captures attention, adding a wow factor that enhances the model’s display value. Secondly, working lights provide an avenue for personalization, allowing enthusiasts to replicate specific vehicle features or create unique lighting schemes. From classic car headlights to modern LED arrays, the possibilities are vast. Furthermore, incorporating lights allows modelers to demonstrate technical proficiency. The ability to skillfully integrate electronics into a small-scale model is a testament to the builder’s dedication and attention to detail, turning a hobby into an art form.
Fact 1 Scale and Compatibility
Understanding scale is critical when adding working lights to custom diecast cars. Diecast models come in various scales, such as 1 18, 1 24, and 1 43. The scale determines the model’s size relative to the real vehicle. When choosing lights, it’s essential to select components that fit appropriately within the model’s scale. For instance, larger scales (like 1 18) provide more space for intricate lighting systems and larger LEDs. Smaller scales necessitate compact components and precise wiring. Compatibility extends to the types of lights as well; scale affects the size and brightness that look realistic. Careful consideration of scale ensures that the lights enhance, rather than overwhelm, the model’s aesthetics. A mismatch in scale can quickly ruin the model’s overall look and authenticity.
Understanding Diecast Car Scales

Diecast car scales are a standardized system used to represent the size ratio between the model and the actual vehicle. Common scales include 1 18, 1 24, 1 43, and 1 64. A 1 18 scale model is 1 18th the size of the real car, a 1 24 model is 1 24th the size, and so on. Each scale has its advantages and disadvantages in terms of detail and available components. For example, 1 18 scale models are generally larger and offer more space for intricate lighting and detailing, but they also require more space for display. Smaller scales, such as 1 64, are more compact but may be more challenging to work with due to limited space. Understanding these differences is fundamental to selecting the appropriate components for custom lights.
Choosing the Right Scale for Lights
When choosing lights, scale compatibility is vital. Select LEDs, resistors, and wiring that are proportional to the model’s size. Smaller scales require micro-LEDs and thinner wires to avoid looking out of place. Consider the size of the light housing and the available space within the car’s body. For larger scales, you have more flexibility with component size, allowing for brighter lights and more complex lighting configurations. Always ensure the lights do not protrude excessively or interfere with the model’s aesthetics. Researching the appropriate component sizes for the model’s scale beforehand will save time and ensure a professional-looking finish. Always test fit components before finalizing any installation.
Fact 2 LEDs The Preferred Lighting
LEDs (Light Emitting Diodes) are the most popular choice for lighting custom diecast cars, offering several advantages over traditional bulbs. Their compact size makes them easy to integrate into small-scale models. LEDs also consume less power and generate minimal heat, reducing the risk of damaging the model’s plastic components. Their long lifespan ensures the lighting system is durable. LEDs come in a wide range of colors and brightness levels, allowing for versatile lighting effects. They are readily available and relatively inexpensive, making them an accessible option for hobbyists of all skill levels. The combination of efficiency, durability, and aesthetic options makes LEDs the go-to choice for model lighting.
Advantages of Using LEDs

LEDs have numerous advantages over other lighting options. Their small size allows for discreet placement within the model, maintaining realism. Energy efficiency is another key benefit; LEDs consume significantly less power, which means longer battery life and less strain on the power source. The low heat output of LEDs minimizes the risk of melting or warping plastic parts. LEDs also boast a significantly longer lifespan, providing reliable lighting for years. Their instant-on capability eliminates the warm-up time associated with some bulbs. Furthermore, the wide variety of colors and brightness levels allows for customized lighting effects. These features make LEDs the optimal choice for model car lighting.
Different Types of LEDs
Various types of LEDs are available for customizing diecast cars. Surface-mount LEDs (SMDs) are popular due to their small size and ease of use, making them suitable for various applications. Through-hole LEDs offer a more traditional look. Pre-wired LEDs simplify installation and are ideal for beginners. RGB LEDs enable a spectrum of colors through a single unit, providing creative options. Choosing the right type depends on the model’s size, the desired lighting effects, and the builder’s experience level. Consider the LED’s brightness (measured in millicandelas) and viewing angle. Experimenting with different LED types helps achieve unique and impressive lighting setups.
Fact 3 Power Sources for Lights
Choosing the right power source is crucial for powering the lights in your custom diecast car. Several options exist, each with its pros and cons. Batteries, such as button cells or small rechargeable LiPo batteries, provide portability and ease of use. However, they require periodic replacement or recharging. External power supplies offer continuous power but tether the model to a power outlet. For experienced modelers, integrating a small circuit with a voltage regulator can allow for using a single power source for multiple lights. The choice depends on your preference for convenience, portability, and the complexity of your setup. Always consider the voltage requirements of the LEDs to avoid damaging them.
Battery Options

Battery options for powering lights include button cell batteries, small rechargeable LiPo batteries, and AA or AAA batteries. Button cells are compact and suitable for smaller models. Rechargeable LiPo batteries provide a longer runtime, though require a separate charging circuit. AA or AAA batteries offer longer life but take up more space. Consider the model’s scale and the available space for the battery compartment when selecting a battery type. Always use the correct voltage and current rating for the LEDs to prevent damage. Ensure the battery compartment is secure and easily accessible for battery replacement or charging. Battery choice affects both the model’s functionality and ease of use.
Wiring Considerations
Proper wiring is essential for safe and reliable operation. Use appropriately sized wires for the current draw of the LEDs. Thinner wires are sufficient for small-scale models. When selecting wire, consider flexibility and durability. Route wires neatly, avoiding sharp bends and potential pinch points. Solder connections securely and insulate them with heat shrink tubing to prevent short circuits. Consider the placement of the power switch and battery compartment for ease of access. Use resistors in series with the LEDs to limit the current and prevent them from burning out. Double-check all connections and test the circuit before sealing the model to prevent future issues.
Fact 4 Essential Tools and Materials
Having the right tools and materials is vital for a successful diecast car lighting project. A soldering iron, solder, and flux are essential for making secure electrical connections. A multimeter helps in testing circuits and verifying voltage and current. Small screwdrivers, pliers, and wire strippers are needed for preparing the model and wiring. Heat shrink tubing provides insulation and protection for solder joints. Super glue, epoxy, and other adhesives secure components within the model. A sharp hobby knife or X-Acto knife is useful for precise cutting and detailing. A well-equipped workspace and the right tools simplify the process and ensure a professional finish.
Tools for Customization

The tools needed include a soldering iron with a fine tip for precise work, solder, and flux for making electrical connections. A multimeter is essential for testing and troubleshooting circuits, measuring voltage, and ensuring current flow. Small screwdrivers, pliers, and wire strippers are crucial for preparing the model and handling wires. A hobby knife or X-Acto knife is needed for precise cutting and detailing, while a drill with small drill bits is used for creating holes for the lights. Consider a magnifying glass or a head-mounted magnifier to see small components. Proper lighting in the workspace is important to reduce eye strain and improve work quality. Having these tools on hand ensures the accuracy and efficiency of the customization process.
Materials for Wiring and Lights
Materials are the foundation of your lighting project, including various types of LEDs (SMD, through-hole, pre-wired, or RGB). Resistors of the correct value are crucial for limiting current and protecting the LEDs. Thin insulated wires (28 or 30 gauge) are typically used for wiring the lights. Heat shrink tubing provides insulation and a neat finish for solder joints. Super glue or epoxy is used to secure the lights and other components inside the model. Clear plastic or acrylic sheets can be used for light lenses, while paint and detailing supplies can be used for customizing the model’s appearance. Always choose high-quality components to ensure longevity and performance, making sure to have a variety of sizes and types to meet your needs.
Fact 5 Wiring Techniques
Proper wiring techniques are crucial for creating functional and reliable lighting systems. Always start by planning the circuit layout and measuring the required wire lengths. Strip the wire ends carefully, avoiding damage to the insulation. Solder connections securely, using flux to ensure a good bond. Insulate all soldered connections with heat shrink tubing to prevent short circuits. When routing wires, keep them neat and organized, using adhesive tape or glue to secure them within the model. Consider using a breadboard for prototyping and testing your circuit before permanently soldering components. Double-check all connections with a multimeter and test the lights before completing the assembly of the model. Following correct wiring techniques not only ensures functionality but also enhances the aesthetic appeal of the finished project.
Routing Wires

Routing wires involves strategically placing the wires within the model to maintain functionality and aesthetics. Plan the wire path before starting, visualizing how each wire will connect from the power source to the lights. Use existing openings or drill small holes to pass wires from one compartment to another. Secure wires with adhesive tape or glue to prevent them from moving around, which could lead to shorts or damage. Keep the wires away from moving parts, like wheels or steering mechanisms, to prevent interference. When possible, conceal the wires to maintain the model’s appearance. A well-planned and executed wiring layout enhances the model’s overall look.
Connecting Lights
Connecting lights involves securely attaching LEDs to the wiring circuit. Solder LEDs to the wires, ensuring the correct polarity. Use a multimeter to verify the connections. For LEDs with multiple pins (like RGB LEDs), consult the datasheet for the correct wiring scheme. After soldering, use heat shrink tubing to insulate the connections, preventing any possibility of shorts. Double-check the connections before applying power, and always test the lights. Ensure all connections are secure and properly insulated. A neat and correctly wired connection is critical for long-lasting performance. Test the lights thoroughly to confirm all features are working as intended.
Fact 6 Realistic Lighting Effects
Achieving realistic lighting effects enhances the model’s appeal, creating a more immersive experience. Headlights and taillights are essential, using bright white LEDs for headlights and red LEDs for taillights. Simulating brake lights by adding a second set of red LEDs is recommended. Interior lighting can be achieved with soft white or yellow LEDs, providing a sense of realism. Consider using resistors to control the brightness of the lights and create different lighting effects. Adding a flashing or strobe effect to emergency lights adds a dynamic element. Experiment with different color temperatures and brightness levels to mimic the lighting of the real vehicle. The attention to detail in lighting effects is what sets apart a good model from a great one.
Simulating Headlights and Taillights
Simulating headlights and taillights is crucial for adding realism. Use bright white LEDs for headlights and red LEDs for taillights. When installing headlights, ensure they are appropriately positioned within the headlight housing and angle them to project light forward. For taillights, fit the LEDs within the tail light housing, considering how light diffuses through the lens. Consider adding a second set of red LEDs to simulate brake lights, activated when the brakes are applied. Use the appropriate resistors to control the brightness of the lights, matching the scale. Test all the lights and ensure they are correctly aligned and functioning as intended to create an authentic lighting setup.
Adding Interior Lights
Adding interior lights can further enhance realism. Use soft white or yellow LEDs to simulate interior cabin lights. Position the LEDs discreetly, avoiding direct view. You can place them under the dashboard or in the roof, providing indirect lighting. Consider using a diffuser, such as translucent plastic, to soften the light and create a more natural look. Ensure the interior lighting is not too bright, as it can distract from other model details. The goal is to achieve a subtle glow that adds depth. Test the interior lights alongside the headlights and taillights to ensure a harmonious lighting effect. The addition of interior lights adds realism and attention to detail.
Fact 7 Safety and Precautions
Safety is paramount when working with small parts and electronics. Always wear safety glasses to protect your eyes from solder splatters or flying debris. Work in a well-ventilated area when soldering to avoid inhaling fumes. Handle small components with care to prevent swallowing them or injury. Ensure all electrical connections are secure and properly insulated to prevent short circuits. Double-check all wiring before applying power, and avoid touching live circuits with your fingers. It’s best practice to disconnect the power source when making adjustments or performing maintenance. By following these safety measures, you can ensure a safe and enjoyable building experience.
Working with Small Parts
Working with small parts presents challenges. Use a well-lit workspace with a magnifying glass or a head-mounted magnifier to see detail. Employ fine-tipped tweezers and small pliers for handling components. Work over a clear surface to minimize the risk of losing small parts. Organize components in containers to maintain order and prevent losing pieces. Be patient and work carefully to avoid damaging the components or the model. Take breaks to prevent eye strain or fatigue, which can make precision work more difficult. Keep a clean and organized workspace, as this can greatly enhance both the quality of your work and the enjoyment of the project.
Avoiding Short Circuits
Avoiding short circuits is essential for electrical safety. Always insulate all solder connections with heat shrink tubing to prevent accidental contact. Route wires carefully, avoiding sharp bends or pinch points. Ensure wires do not cross each other. Double-check all wiring before applying power. Use a multimeter to test for any continuity between points that should not be connected. Before closing the model, inspect the circuit and components. The risk of shorts should be minimized to ensure the safe operation of your lighting system and the model. Taking care in all wiring steps prevents potential hazards and ensures your model’s longevity.
Where to Find Resources and Inspiration
There are many resources and sources of inspiration to help you get started on your custom diecast car lighting projects. Online communities, such as forums and social media groups dedicated to model cars, are excellent places to learn from other enthusiasts, ask questions, and share your work. Books and guides on model building provide in-depth instructions, diagrams, and techniques. Visit model car shows or attend workshops to see impressive examples and learn new skills. Search the internet for videos and tutorials to guide you through specific steps. Explore real car lighting systems for inspiration. Start with easy projects and gradually increase the complexity as your skills improve. The more resources you use, the more successful your projects will be.
Online Communities
Online communities are invaluable resources for custom diecast car enthusiasts. Forums, such as those on specialized model car websites, provide platforms for sharing tips, asking questions, and connecting with like-minded individuals. Social media groups dedicated to model cars offer a space to showcase your work, find inspiration, and discuss techniques. Many groups have active members who share detailed build logs, photos, and videos. Joining these online communities allows you to learn from experienced modelers, find solutions to technical challenges, and discover new ideas. Participating in discussions, sharing your projects, and offering help fosters a collaborative environment where you can expand your knowledge and build your passion.
Books and Guides
Books and guides provide a wealth of information for enthusiasts. Look for books dedicated to model building, detailing, and electrical modifications. These books often include detailed step-by-step instructions, diagrams, and techniques. Publications specifically on adding working lights offer specific guidance on wiring, component selection, and lighting effects. Search online retailers or visit specialty hobby shops to browse the available resources. Many books feature inspiring examples, build logs, and advice from experienced modelers. Reading these resources is a great way to improve your understanding of the hobby and to learn advanced techniques. Books and guides help to build confidence and assist in mastering all the skills you will need.