What You’ll Need to Clean Diecast Cars (Supplies)
Cleaning your diecast model cars properly requires the right tools and supplies. Using the wrong materials can potentially damage the delicate paint and details of your prized collectibles. This section outlines the essential items you’ll need to gather before starting the cleaning process. Remember to work in a well-lit area and on a clean surface to prevent accidental damage or the introduction of new dirt onto your models. Having these supplies readily available will make the cleaning process smoother and more effective, ensuring your diecast cars look their best and are protected for years to come. The key is gentle cleaning using proper materials to avoid any damage.
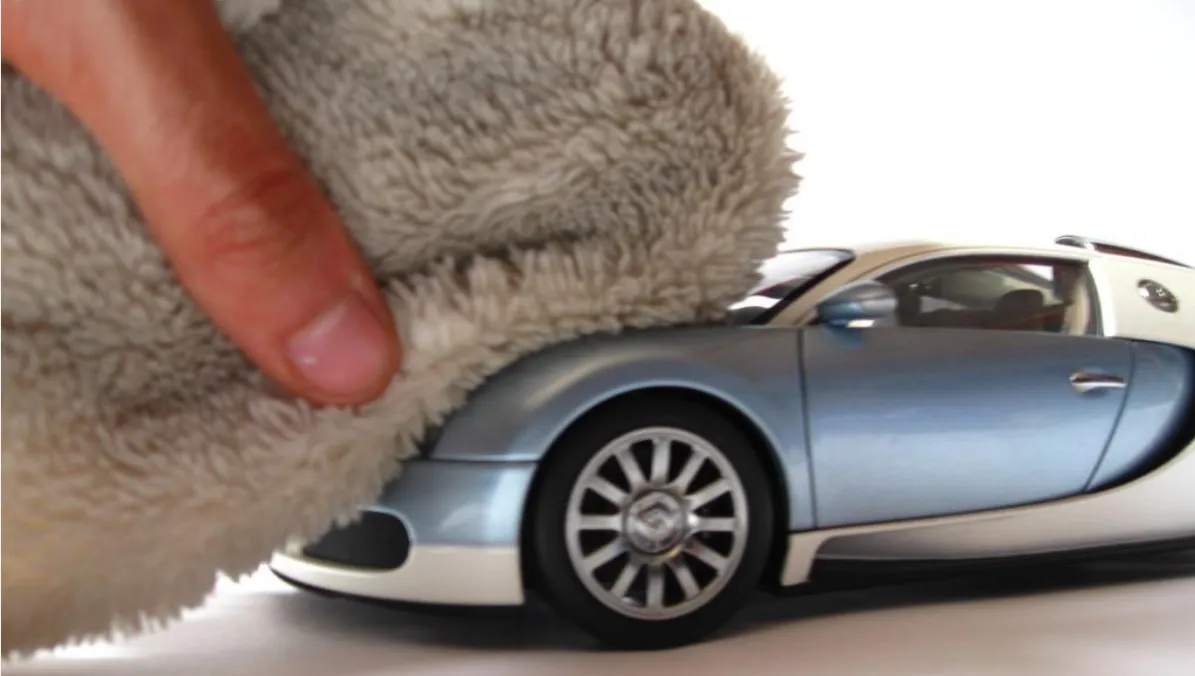
Soft Microfiber Cloths (Details)
Microfiber cloths are your best friend when cleaning diecast cars. Their soft, non-abrasive nature makes them ideal for gently removing dust and dirt without scratching the paint. Always use clean microfiber cloths to avoid transferring any grime from one area of the car to another. Having a variety of sizes will be helpful for different parts of the car, ensuring you can reach every nook and cranny. Consider having several on hand, as you’ll want to swap them out as they get dirty to prevent re-depositing dirt onto the model’s surface. Make sure that your microfiber cloths are washed separately from other items and air-dried to prevent damage to your diecast cars.
Mild Soap or Detergent (Details)

When it comes to washing your diecast cars, choose a mild soap or detergent specifically designed for delicate surfaces. Harsh chemicals found in some household cleaners can strip the paint or damage the decals. Avoid using abrasive cleaners, strong solvents, or anything with bleach. Baby shampoo or a car wash soap designed for detailing are excellent choices. Always dilute the soap with water according to the manufacturer’s instructions to avoid oversaturation and potential residue. Test the solution on a small, inconspicuous area of the car first to ensure it doesn’t react with the paint.
Distilled Water (Details)
Using distilled water is crucial to prevent water spots. Tap water often contains minerals that can leave unsightly marks on your diecast cars, especially when they dry. Distilled water is free of these impurities, ensuring a spotless finish. For rinsing and diluting your cleaning solutions, distilled water is the best option. This will guarantee the best results. This is a simple but important step that helps achieve a professional-looking finish and preserves the model’s appearance.
Cotton Swabs (Details)
Cotton swabs are perfect for detailed cleaning of small crevices, around emblems, and in the interior of your diecast models. Their small size allows you to reach difficult-to-access areas. Choose cotton swabs that are tightly wound to prevent lint from snagging on details. Dip the cotton swab lightly in your cleaning solution or distilled water and gently clean the desired areas. Remember not to apply too much pressure, as this could potentially damage the delicate parts of the model. Cotton swabs are a must-have tool for achieving a truly thorough cleaning.
Soft-Bristled Brush (Details)

A soft-bristled brush is great for gently removing dust and dirt from hard-to-reach areas such as grills, vents, and around the wheels. Avoid using brushes with stiff bristles, as they can scratch the paint. A soft toothbrush or a specialized detailing brush will work best. Use the brush to gently loosen any dirt or debris. Avoid using excessive pressure. It’s better to take your time and clean the model carefully than to rush and risk damaging the details. This tool helps ensure a comprehensive and safe cleaning process for your diecast models.
Compressed Air (Details)
Compressed air is useful for removing dust and debris from tight spaces and crevices, especially before any wet cleaning. Use a can of compressed air, specifically designed for electronics, to gently blow away dust particles. Hold the can at a safe distance from the model to avoid spraying the components. This is a great way to prep the model before you move on to other cleaning steps. Be careful when using compressed air around delicate parts like mirrors or antennas. The goal is to remove loose particles without causing any damage.
Dusting and Surface Preparation
Before starting any wet cleaning, it’s essential to remove loose dust and debris. This step helps prevent scratches and ensures a more effective cleaning process. Proper preparation is key to achieving a pristine finish. Regular dusting is a great way to keep your models looking their best between deep cleanings. This initial step will make your car cleaning easier and more effective, protecting your investment and preserving your cars in mint condition.
Gentle Dusting Techniques

Use a soft microfiber cloth or a specialized dusting brush to gently remove dust from the surface of your diecast models. Avoid applying too much pressure, as this could scratch the paint or damage delicate parts. Move the cloth or brush in a circular or sweeping motion to lift the dust. Be careful around intricate details, emblems, and delicate parts. A small, soft brush can be used to reach hard-to-access areas. Dust your models regularly to prevent a buildup of grime. This simple but essential step will keep your models in top condition.
Preparing the Surface for Cleaning
After dusting, inspect the diecast car for any stubborn dirt or grime that might require additional attention. Consider using compressed air to remove any loose debris from crevices and hard-to-reach areas. If you notice any sticky residue or fingerprints, gently wipe the area with a slightly damp microfiber cloth. Before washing, make sure you have all your cleaning supplies ready. Preparing the surface properly ensures that the wet cleaning steps will be more effective and will help you to get a fantastic result.
Cleaning the Diecast Car Body
Cleaning the car body is the core of the process. It will restore the shine and details of your models. Proper washing will remove dirt and contaminants that can damage the paint over time. Using the right techniques and products will help you achieve professional-looking results and preserve your models. Work in a well-lit area and take your time to avoid any mistakes.
Washing the Car Body (Step-by-Step)

- Mix a small amount of mild soap or detergent with distilled water in a clean container.
- Dip a soft microfiber cloth into the solution, ensuring it’s not overly saturated.
- Gently wipe the car body with the damp cloth, working in small sections.
- Rinse the cloth frequently with clean distilled water to remove any dirt.
- After washing, rinse the car body with clean distilled water to remove any soap residue.
- Dry the car body immediately with a clean, dry microfiber cloth.
Dealing with Stubborn Dirt and Grime
For stubborn dirt or grime, use a cotton swab dipped in your cleaning solution to gently clean the affected areas. Avoid applying too much pressure or rubbing vigorously, as this could damage the paint. A soft-bristled brush can also be used to loosen dirt from hard-to-reach areas, such as around emblems or vents. If necessary, you can carefully use a small amount of isopropyl alcohol (rubbing alcohol) on a cotton swab to remove sticky residue, but test this on a small, inconspicuous area first. Patience and a careful approach are key.
Cleaning the Wheels and Tires
Wheels and tires can accumulate a lot of dirt and grime. Proper cleaning of these parts will enhance the overall look of your diecast models. Different materials and construction methods may require different cleaning methods. Clean wheels and tires will make your models more visually appealing.
Wheel Cleaning Techniques

Use a soft brush and mild soap solution to clean the wheels. Dip the brush in the solution and gently scrub the wheels, removing any dirt and grime. Use cotton swabs to clean tight spaces and crevices. Rinse the wheels with clean distilled water to remove any soap residue. Dry the wheels with a clean, dry microfiber cloth.
Tire Cleaning Techniques
Clean the tires with a slightly damp microfiber cloth. Avoid using harsh chemicals or abrasive cleaners that could damage the tire material. Gently wipe away any dirt or grime, paying attention to any details. If needed, you can use a cotton swab dipped in a mild soap solution to clean hard-to-reach areas. Allow the tires to air dry before returning the model to its display or storage.
Cleaning the Windows and Interior
Cleaning the windows and interior of your diecast cars will complete the overall detail. They should be clear and free of dust and smudges. Proper care of these features will ensure the cars look realistic and well-maintained.
Window Cleaning

Use a soft microfiber cloth dampened with distilled water to clean the windows. Gently wipe the windows, removing any dust or smudges. Avoid using harsh chemicals or abrasive cleaners that could damage the window material. If necessary, use a cotton swab dipped in distilled water to clean the edges of the windows. Dry the windows with a clean, dry microfiber cloth to prevent water spots.
Interior Detailing
Use a soft brush or cotton swabs to gently clean the interior. Remove dust and debris from the dashboard, seats, and other interior details. A slightly damp cotton swab can be used to clean any sticky residue. Avoid applying any liquids directly to the interior. Allow the interior to air dry completely before returning the model to display or storage. This meticulous approach will help to preserve the intricate details of your diecast model’s interior.
Drying and Polishing
Proper drying and polishing will provide the finishing touches to your diecast car cleaning process. These steps protect the model. It will give your models a professional look. Proper drying and polishing will make your models shine.
Proper Drying Techniques
After washing and rinsing, immediately dry the diecast car with a clean, dry microfiber cloth. Gently pat the surfaces to absorb any remaining moisture. Pay special attention to crevices and hard-to-reach areas, where water can linger. Avoid air drying, as this could leave water spots. Ensure that all parts of the model are completely dry before moving on to the polishing step. Thorough drying is critical in order to keep the model from damage.
Polishing the Diecast Car
Consider using a specialized diecast car polish or a very mild car wax to enhance the shine and protect the paint. Apply a small amount of polish or wax to a clean microfiber cloth and gently rub it onto the car body in a circular motion. Avoid applying too much polish, as this could lead to buildup. Buff the surface with a clean, dry microfiber cloth to remove any excess polish and reveal a brilliant shine. Polishing adds a layer of protection and a professional look to your diecast models.
Protecting Your Diecast Cars
Protecting your diecast car models is essential to maintaining their value and appearance. Proper storage and display methods can help preserve your collection. Taking these extra steps will keep your models in top condition.
Storage Tips
Store your diecast cars in a cool, dry place away from direct sunlight and extreme temperatures. Sunlight can fade the paint, while temperature fluctuations can damage the models. Consider storing your cars in protective cases or display boxes to shield them from dust and accidental damage. Avoid stacking models on top of each other, as this could cause scratches or deformities. Ensure proper storage will maximize the life of your collection.
Displaying Your Diecast Cars
When displaying your diecast cars, choose a location that is away from direct sunlight and dust. Use display cases or shelves to showcase your collection while protecting the models. Rotate your display periodically to prevent any single model from being exposed to light for an extended period. Regularly dust and clean your display area to maintain a clean environment. Proper display helps to enjoy and show off your prized collection.